Boston butt Pilaf at Home – A Meal of Happiness
Pilaf might sound like something you can only find in foreign restaurants, but these days it’s easy to enjoy at home. Originally from the Middle East and Mediterranean, pilaf was made by sautéing rice with spices and spread to Europe through the Crusades and trade. By adding juicy Korean pork neck, soy sauce, and fresh vegetables, we get a Korean-style twist — Pork Neck Pilaf. The savory aroma of pork blends beautifully with the natural sweetness of veggies, making it a one-bowl comfort meal.
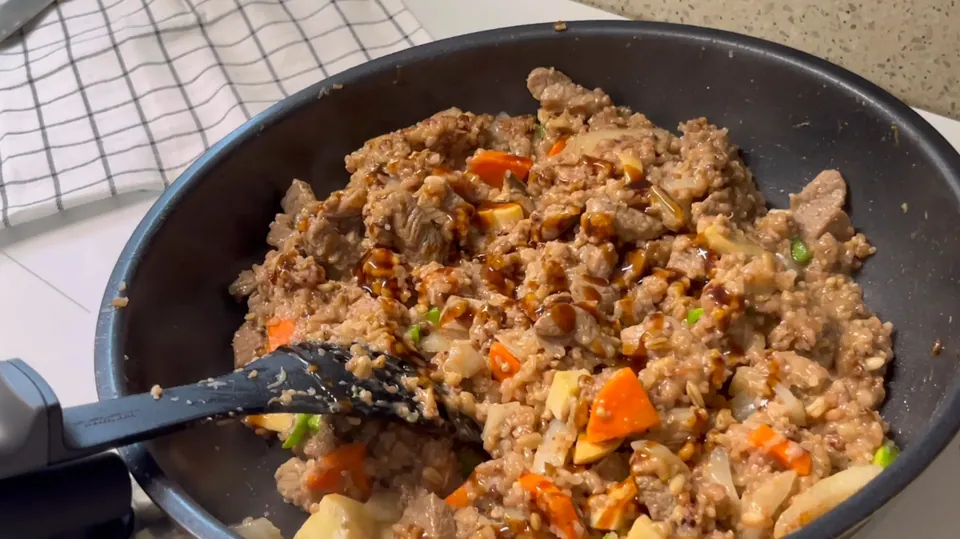
Hello everyone :)
Today, I am excited to share a recipe for a dish that our family absolutely adores, and one that is also the perfect solution for cleaning out the refrigerator: Boston butt pilaf (Pork Neck Pilaf).
My husband, in particular, always craves a hearty, meat-packed rice dish after a long, exhausting day at work. This pilaf is one of his absolute favorites because it uses simple, everyday ingredients to create a deep, rich, restaurant-quality flavor. It is the kind of comforting meal that makes me feel incredibly proud and happy every single time I set it down on our dining table.
Although pilaf might look very similar to standard fried rice at first glance, it actually has a fascinating history and a distinct cooking methodology. Historically, pilaf (or pilau) originated in the Middle East, India, and the Mediterranean regions. Unlike Chinese fried rice, which is made by stir-frying pre-cooked cold rice, traditional pilaf is made by first sautéing raw grains in oil or butter to coat the starches, and then simmering the grains in a flavorful broth until all the liquid is absorbed. Through the Crusades and ancient trade routes, this cooking technique spread across Europe and Asia, adapting to local ingredients along the way. The recipe I am sharing today is a Korean-style adaptation. Instead of using the strong, heavy spices typical of Middle Eastern cuisine, I have used a savory base of soy sauce, oyster sauce, and garlic to create a warm, familiar, and comforting flavor profile. If you reduce the oil and chop the ingredients finely, it also makes a wonderful, gentle meal for toddlers and young children, often referred to in Korea as “baby-friendly pork pilaf.”
📋 Recipe Overview
- Prep & Cook Time: Approx. 25 mins (Marinating time excluded)
- Difficulty: Easy
- Servings: 2-3 portions
- Cooking Method: Pan-frying / Stir-frying
🧅 Preparing the Vegetables and Marinating the Meat
For the vegetables, I simply gathered whatever leftovers were sitting in my crisper drawer. It is a fantastic way to minimize food waste while ensuring that the meal is packed with essential vitamins and minerals.
- Zucchini (approx. 1/3)
- Carrot (approx. 1/4)
- Onion (approx. 1/2)
- Mushrooms (button or king oyster, 1-2)
- 400g Boston butt (pork neck)
- 1 tbsp minced garlic
- 1 tbsp sugar
- 3 tbsp soy sauce
- 3 tbsp olive oil
The absolute secret to unlocking the best flavor in this dish lies in marinating the pork beforehand. I prepared the pork neck the night before, mixing it thoroughly with the marinade ingredients and letting it rest in the refrigerator overnight. There is a very important piece of kitchen science at play here. Boston butt, or pork neck, is a cut that contains a lot of flavorful marbling, but its muscle fibers are relatively dense and tight. If you cook it immediately without prep, it can easily turn out tough and chewy.
By marinating the meat, we introduce allicin from the minced garlic and sugar molecules, which act as natural tenderizers (enzymatic and chemical tenderization). Sugar is highly hygroscopic, meaning it attracts and holds onto water molecules, helping the pork retain its natural moisture during the high-heat cooking process. Meanwhile, the sodium in the soy sauce denatures the tightly wound protein structures in the meat, allowing the seasoning to penetrate deep into the fibers and resulting in an incredibly tender, juicy texture. Adding a bit of olive oil directly to the marinade coats the meat, creating a barrier that helps lock in the juices as soon as the meat hits the hot pan.
If you are pressed for time and making this on the spot, I highly recommend letting the meat marinate for at least 30 minutes. Also, if you happen to have bell peppers at home, please slice them up and throw them in! They add a delightful crunch, a subtle sweetness, and vibrant colors that make the dish look far more professional. I did not have any bell peppers in my fridge this time, so I had to skip them, but I definitely notice a difference in both visual appeal and flavor when they are included.
When prepping the vegetables, try to chop them into small, uniform pieces, roughly the size of a grain of rice. If the vegetable chunks are too large, they will take longer to cook, won’t integrate well with the rice, and will constantly fall off your spoon. If you are preparing this for a baby or a young child, make sure to chop both the pork and the vegetables even finer—about half the size you normally would—to make it easy for them to chew and digest.
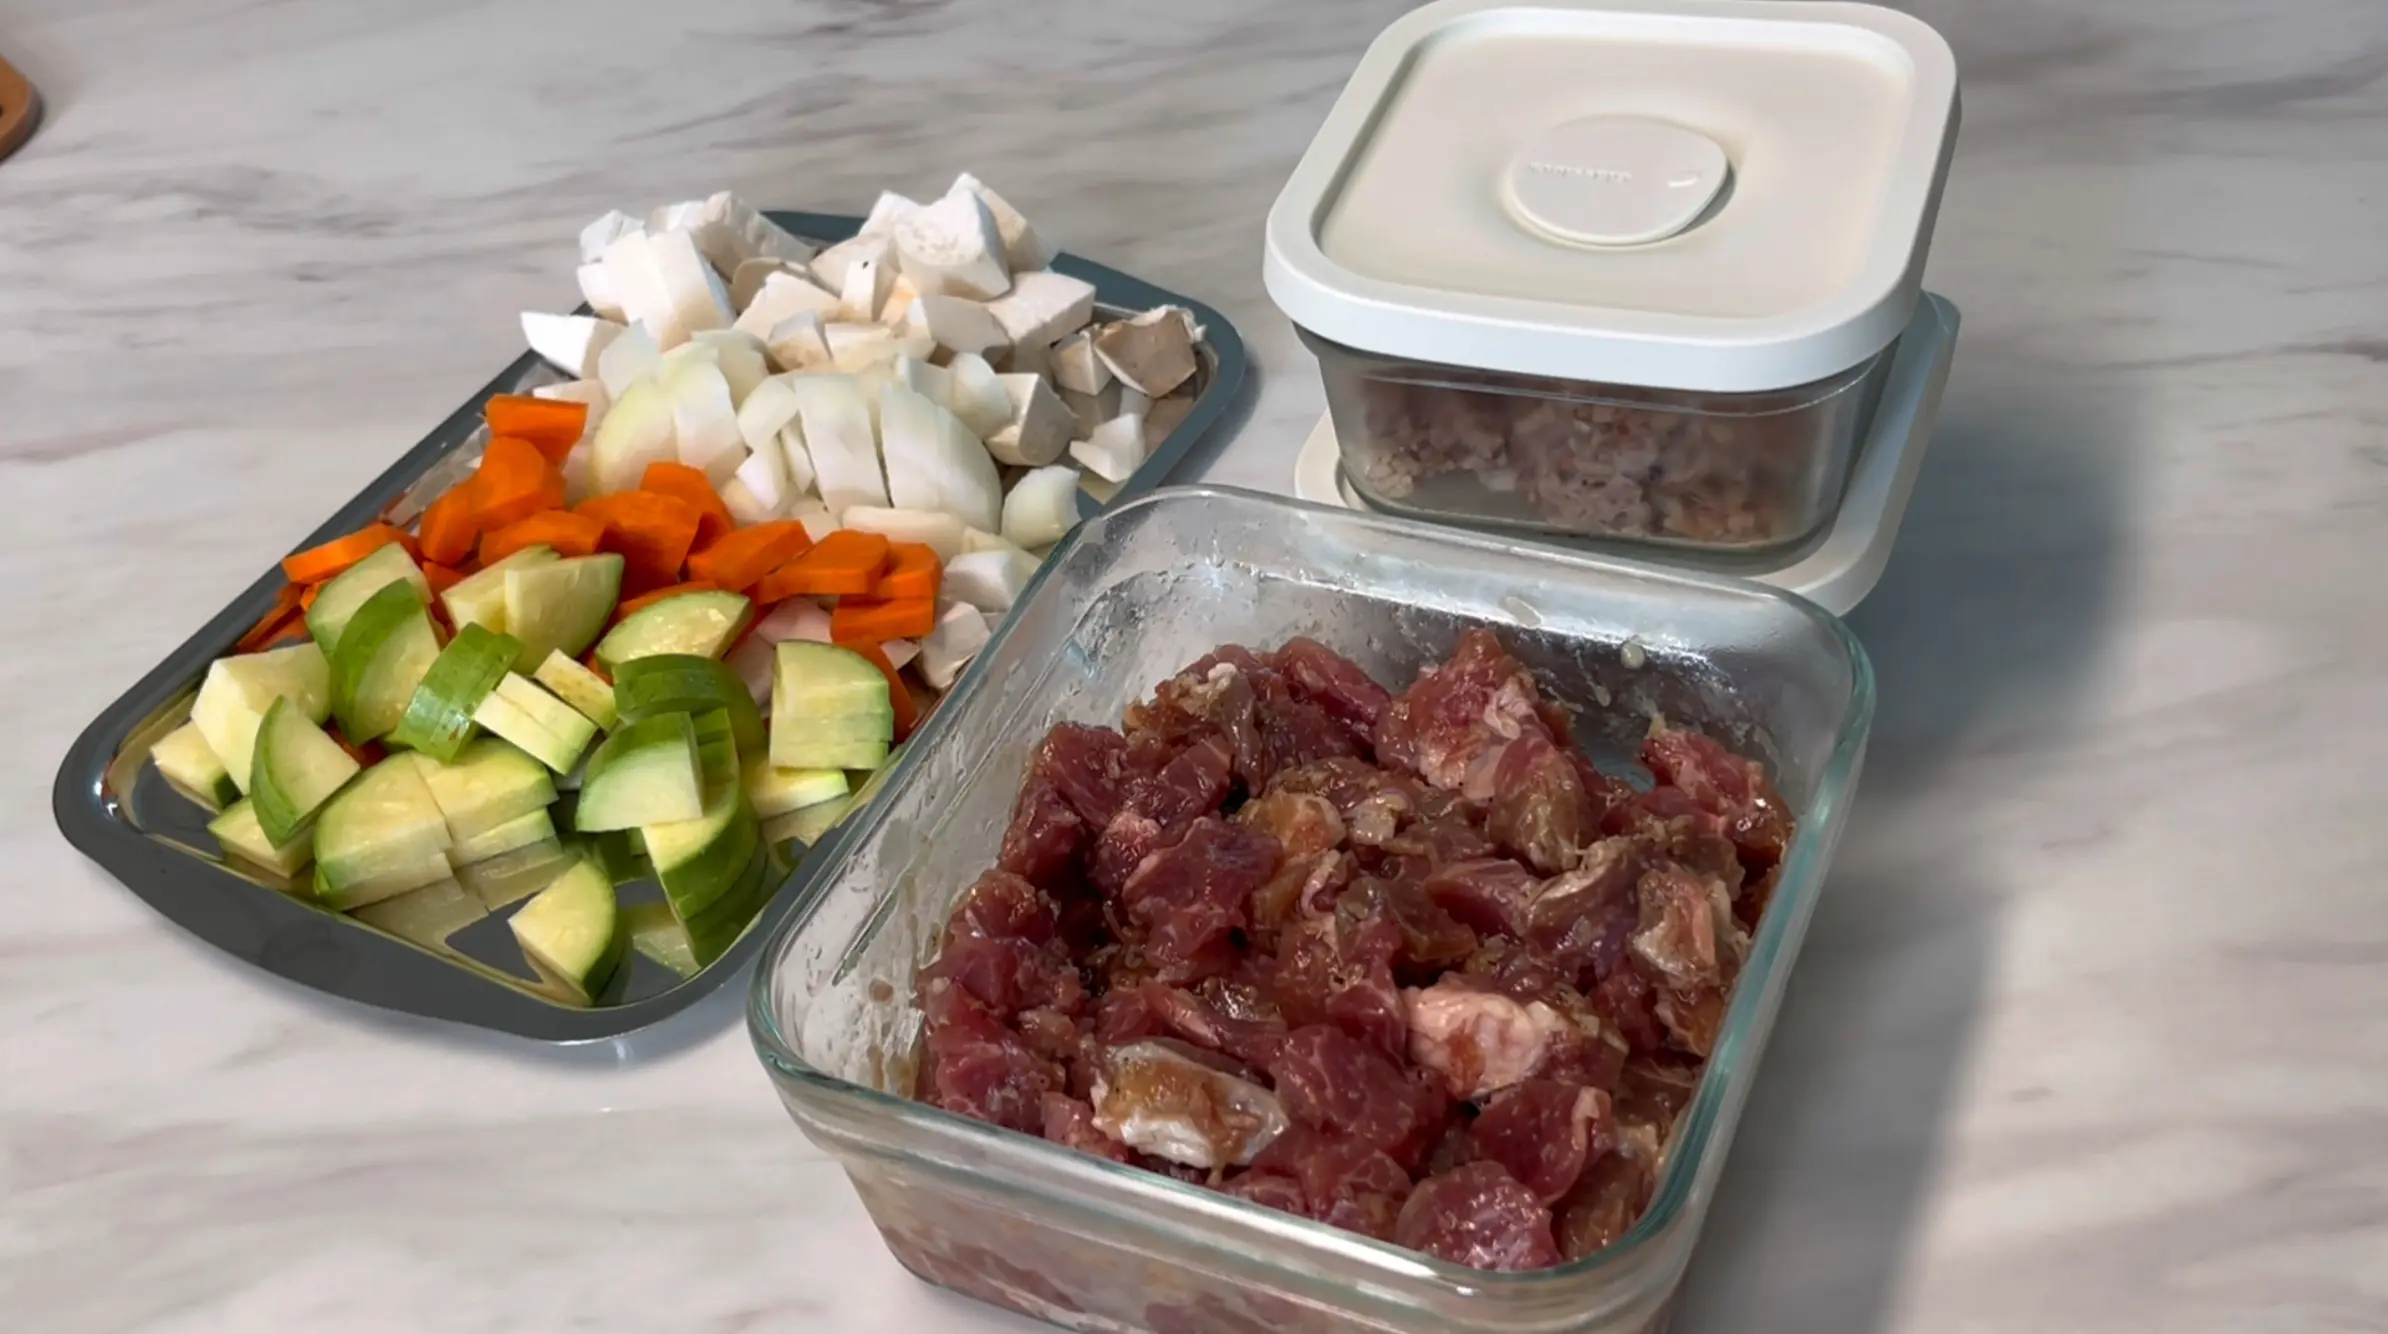
You can easily adjust the level of seasoning to suit your personal preferences. My husband is a massive meat lover, so I used a very generous portion of 400 grams of Boston butt 😄 However, because we will be adding oyster sauce and Worcestershire sauce later when we toss in the rice, it is best to keep the initial pork marinade relatively light and mild.
For those looking for healthy alternatives or who don’t eat pork, here are some ingredient substitution tips: You can easily swap out the pork neck for skinless chicken breast or chicken thighs to reduce the fat content. Sliced beef sirloin or flank steak also works wonderfully, providing a richer, deeper beefy flavor. For a vegetarian or vegan version, try using firm tofu (pressed and crumbled) or tempeh, which absorb the marinade beautifully. To make the dish lower in carbohydrates or more diabetic-friendly, replace the white rice with a 50:50 mixture of brown rice, quinoa, and cauliflower rice. This will dramatically increase the dietary fiber of the meal while keeping your blood sugar stable.
🍳 Let’s Start Stir-Frying! The Maillard Reaction and Temperature Control
Now, let’s get cooking! The most critical elements in this stage are maintaining a high cooking temperature and choosing the right type of rice.
First, heat your pan and add the firmer vegetables—the onions and carrots. You do not need to add a lot of extra cooking oil to the pan because the marinated meat already contains olive oil, and as the onions and carrots heat up, they naturally release their own moisture, allowing them to cook through without sticking or burning. Once the onions start to turn translucent and release their sweet aroma, add the zucchini and mushrooms.
When the vegetables are partially cooked and smelling wonderful, push them to the side of the pan (or remove them temporarily) and add the marinated Boston butt.
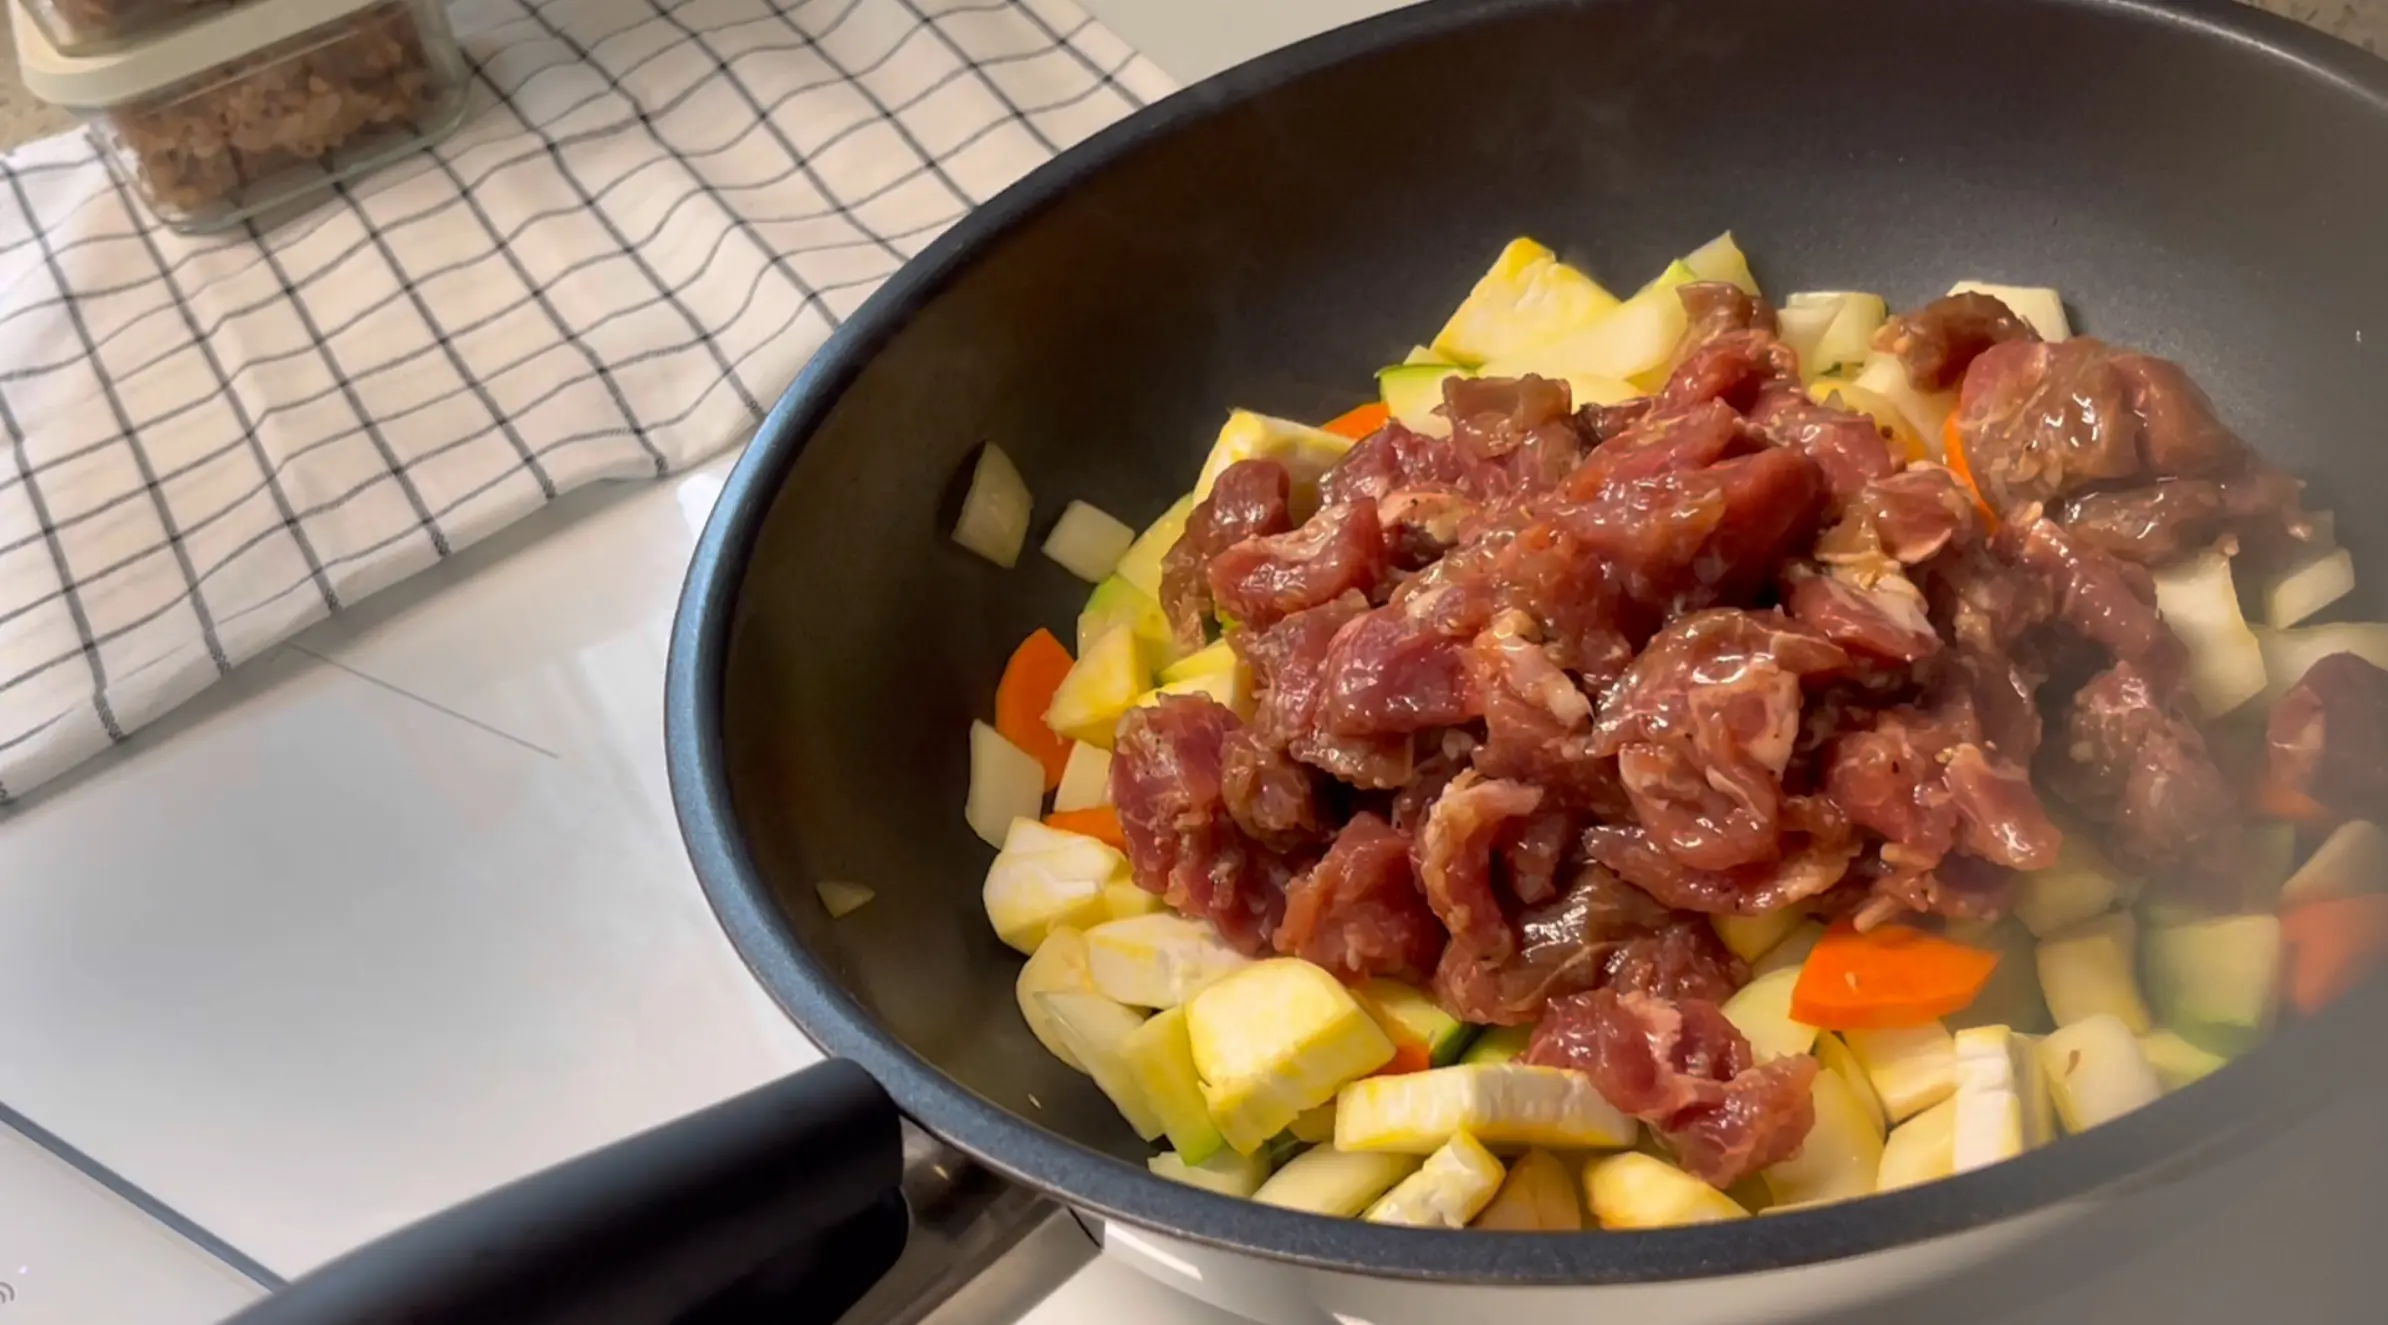
At this point, you must keep the heat on high. This is crucial for triggering the Maillard reaction. The Maillard reaction is a chemical reaction between amino acids and reducing sugars that occurs at high temperatures (typically between 140°C and 165°C / 280°F to 330°F). It is what causes the surface of the meat to turn a deep, beautiful brown and generates hundreds of complex flavor compounds that we associate with savory, roasted, and caramelized goodness.
If the heat is too low, the temperature of the pan will drop rapidly, causing the meat to release all of its juices and moisture at once. Instead of searing and browning, the pork will end up simmering in its own juices. This results in a grey, boiled texture, a loss of depth in flavor, and dry, tough meat. Keep the flame high, let the meat sear to lock in the flavor, and stir-fry quickly.
Once the meat is fully cooked, caramelized, and smelling incredible, add two bowls of cooled rice. This brings us to the most common mistake made by beginner cooks: using freshly cooked, hot, and steaming rice. Freshly cooked rice is loaded with surface moisture, making the starches incredibly sticky. If you toss it straight into a stir-fry, the grains will clump together, creating a mushy, gluey texture.
On the other hand, rice that has been refrigerated or cooled completely has undergone a process called starch retrogradation. The surface moisture has evaporated, leaving the grains firm and dry. When tossed into the hot pan, the individual grains separate easily, allowing them to be coated beautifully by the oils and seasonings.
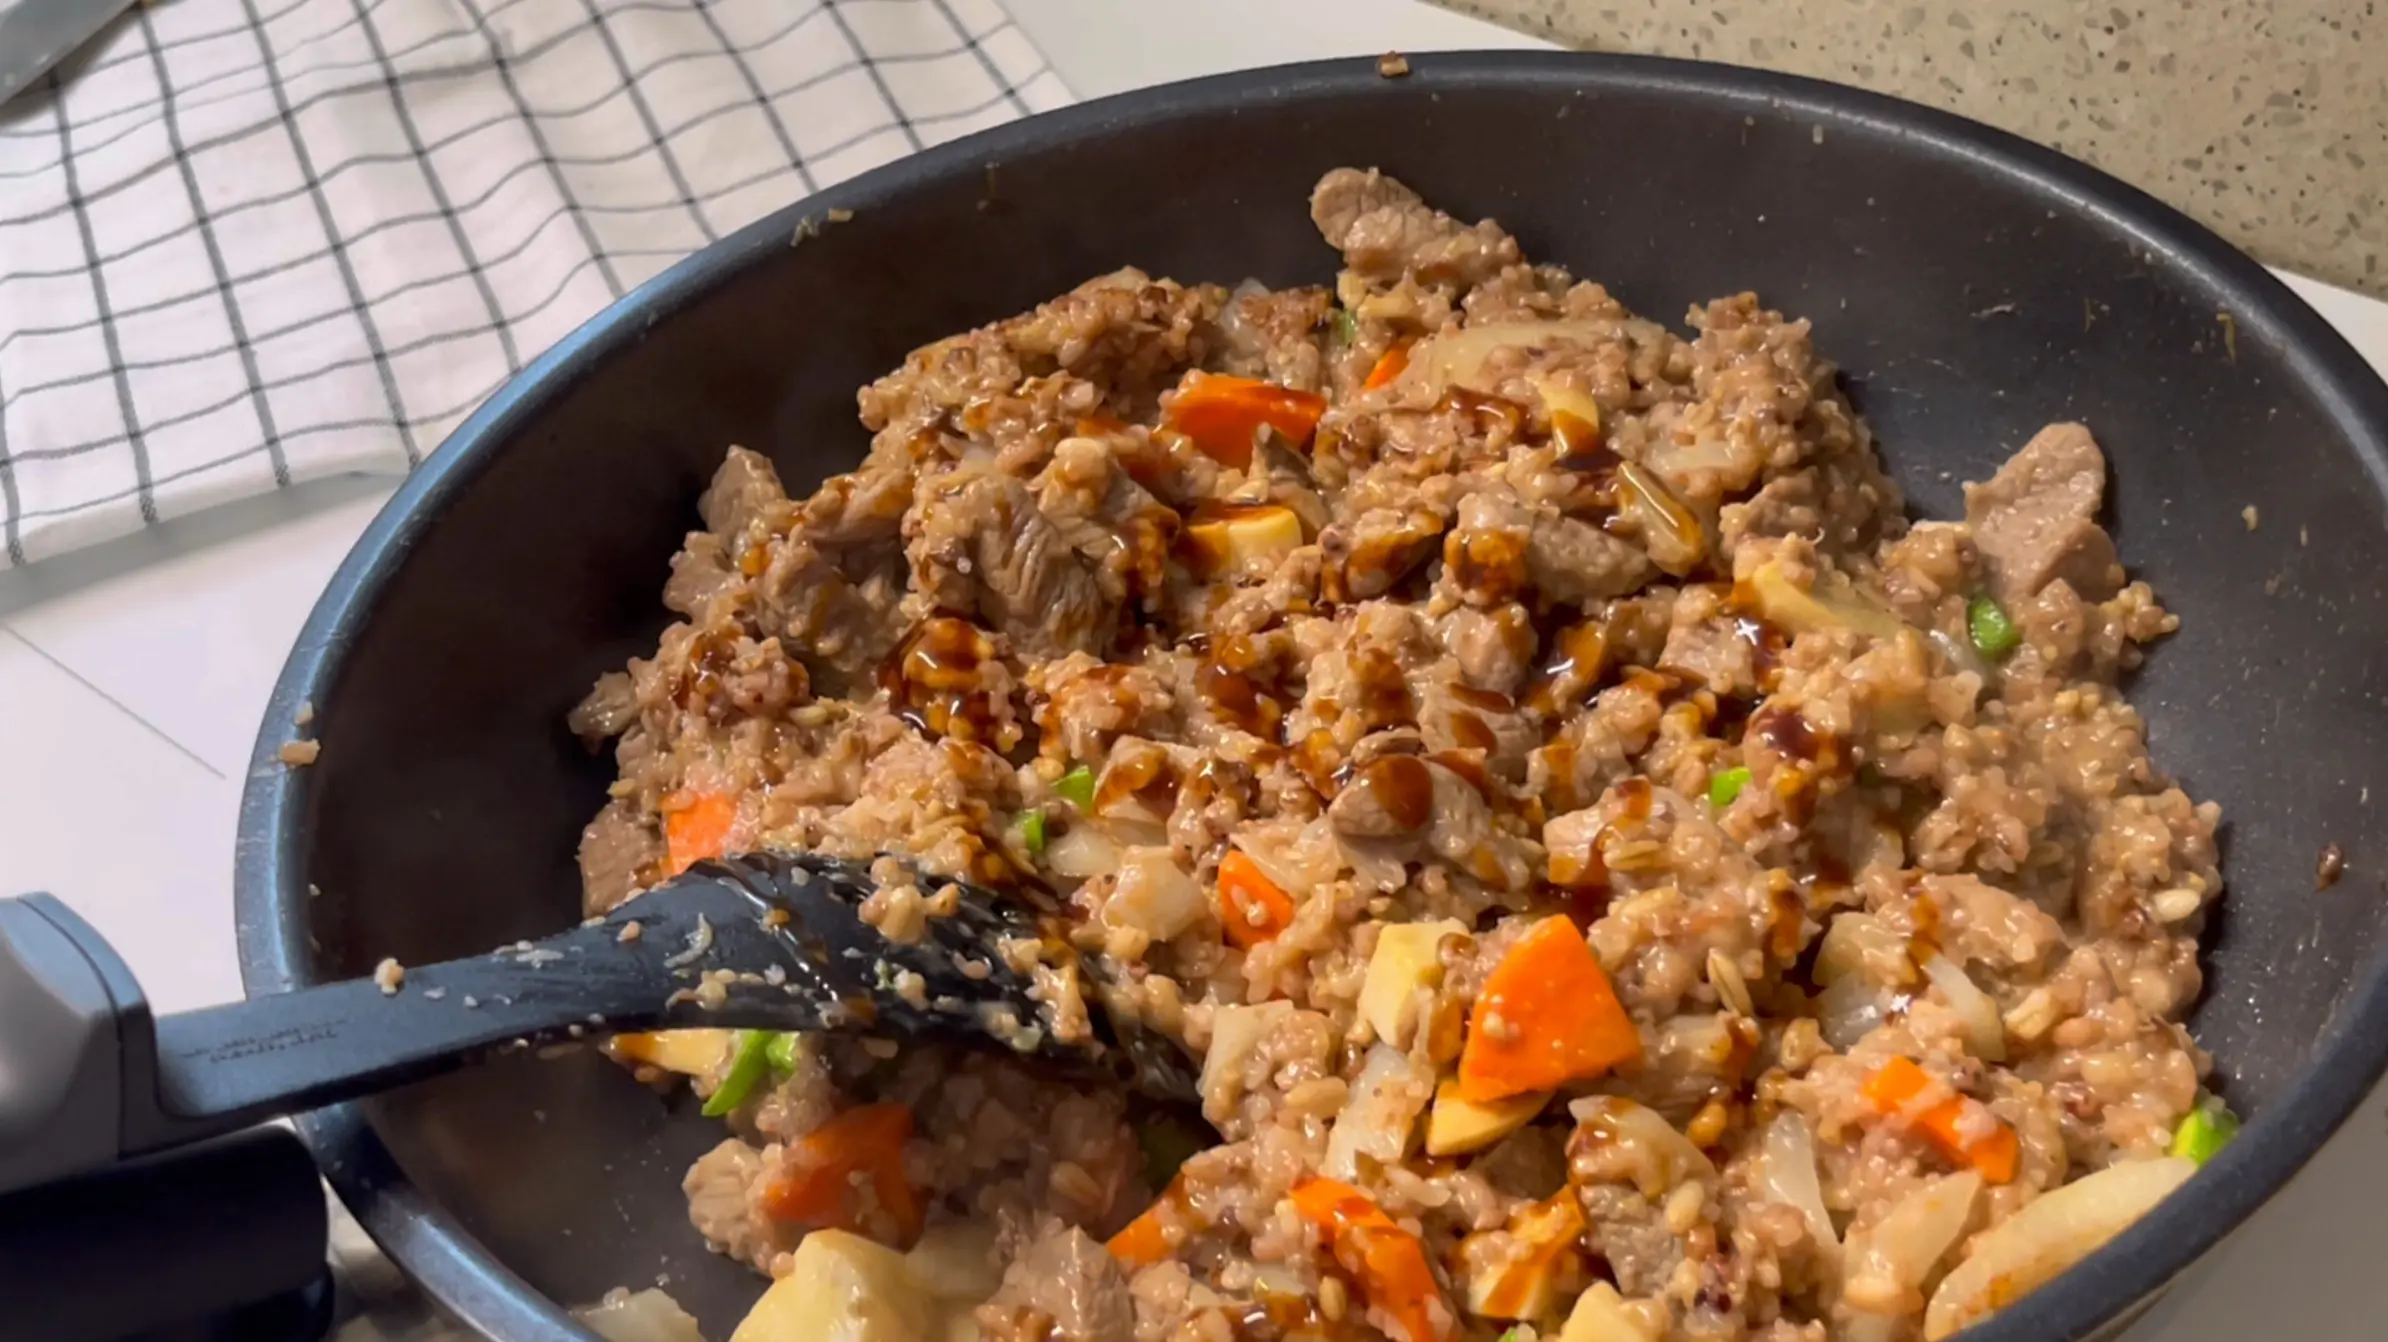
During this session, I was so hungry that I rushed and used rice that was still warm and damp. As a result, my pilaf turned out a bit sticky and clumpy, as you can see in the photos! Even though the texture wasn’t perfectly fluffy, the chewy, comforting taste was still delicious in its own way, and my husband and I enjoyed every bite. However, if you want that perfect, dry, restaurant-style pilaf texture, always use cold, day-old rice. If you only have hot rice, spread it out thinly on a large baking sheet and let a fan blow over it for 10 minutes to dry it out.
Once the rice, meat, and vegetables are well integrated, add 1 tablespoon of oyster sauce and 1 tablespoon of Worcestershire sauce. Oyster sauce provides a deep, umami base, while Worcestershire sauce adds a sharp, tangy, and slightly sweet note that cuts through the richness of the pork. If you don’t have Worcestershire sauce, you can substitute it with 1/2 tablespoon of regular soy sauce, a drop of white vinegar, and a tiny pinch of sugar. Stir-fry quickly using a slicing motion with your spatula rather than pressing down. Finally, spread the rice flat and let it sit undisturbed over medium-high heat for about 30 seconds. This allows the bottom layer to crisp up slightly, adding a wonderful, nutty crunch to the dish.
🍳 With Fried Eggs: The Perfect Touch
No pilaf is complete without a gorgeous fried egg on top! To make it a truly satisfying, protein-packed meal, I fried four eggs for the two of us.
When frying eggs for a pilaf, there is a specific method: cook them sunny-side up so the whites are crispy around the edges but the yolks remain completely runny and warm.

Egg yolk is packed with lecithin, a natural emulsifier. When you place the hot egg on top of the pilaf and break the yolk, it flows over the rice. As you mix it in, the lecithin binds the oils and starch together, creating a silky, velvety coating over each grain of rice, which elevates the mouthfeel and adds a rich, buttery depth of flavor.
To balance the richness of the pork and egg, I served the pilaf with a side of spicy chopped pickled chili peppers (Gochoo-Dajim). Taking a bite of the savory pilaf with a tiny speck of spicy, tangy chili completely refreshes the palate, making the meal incredibly addictive. If you are serving this to young children, replace the spicy chilies with sweet, grilled pineapple slices or mild cucumber pickles. Grilled pineapple contains an enzyme called bromelain, which helps break down proteins and aids in digestion, while providing a lovely tropical sweetness that kids love.
💛 Sharing a Meal Together
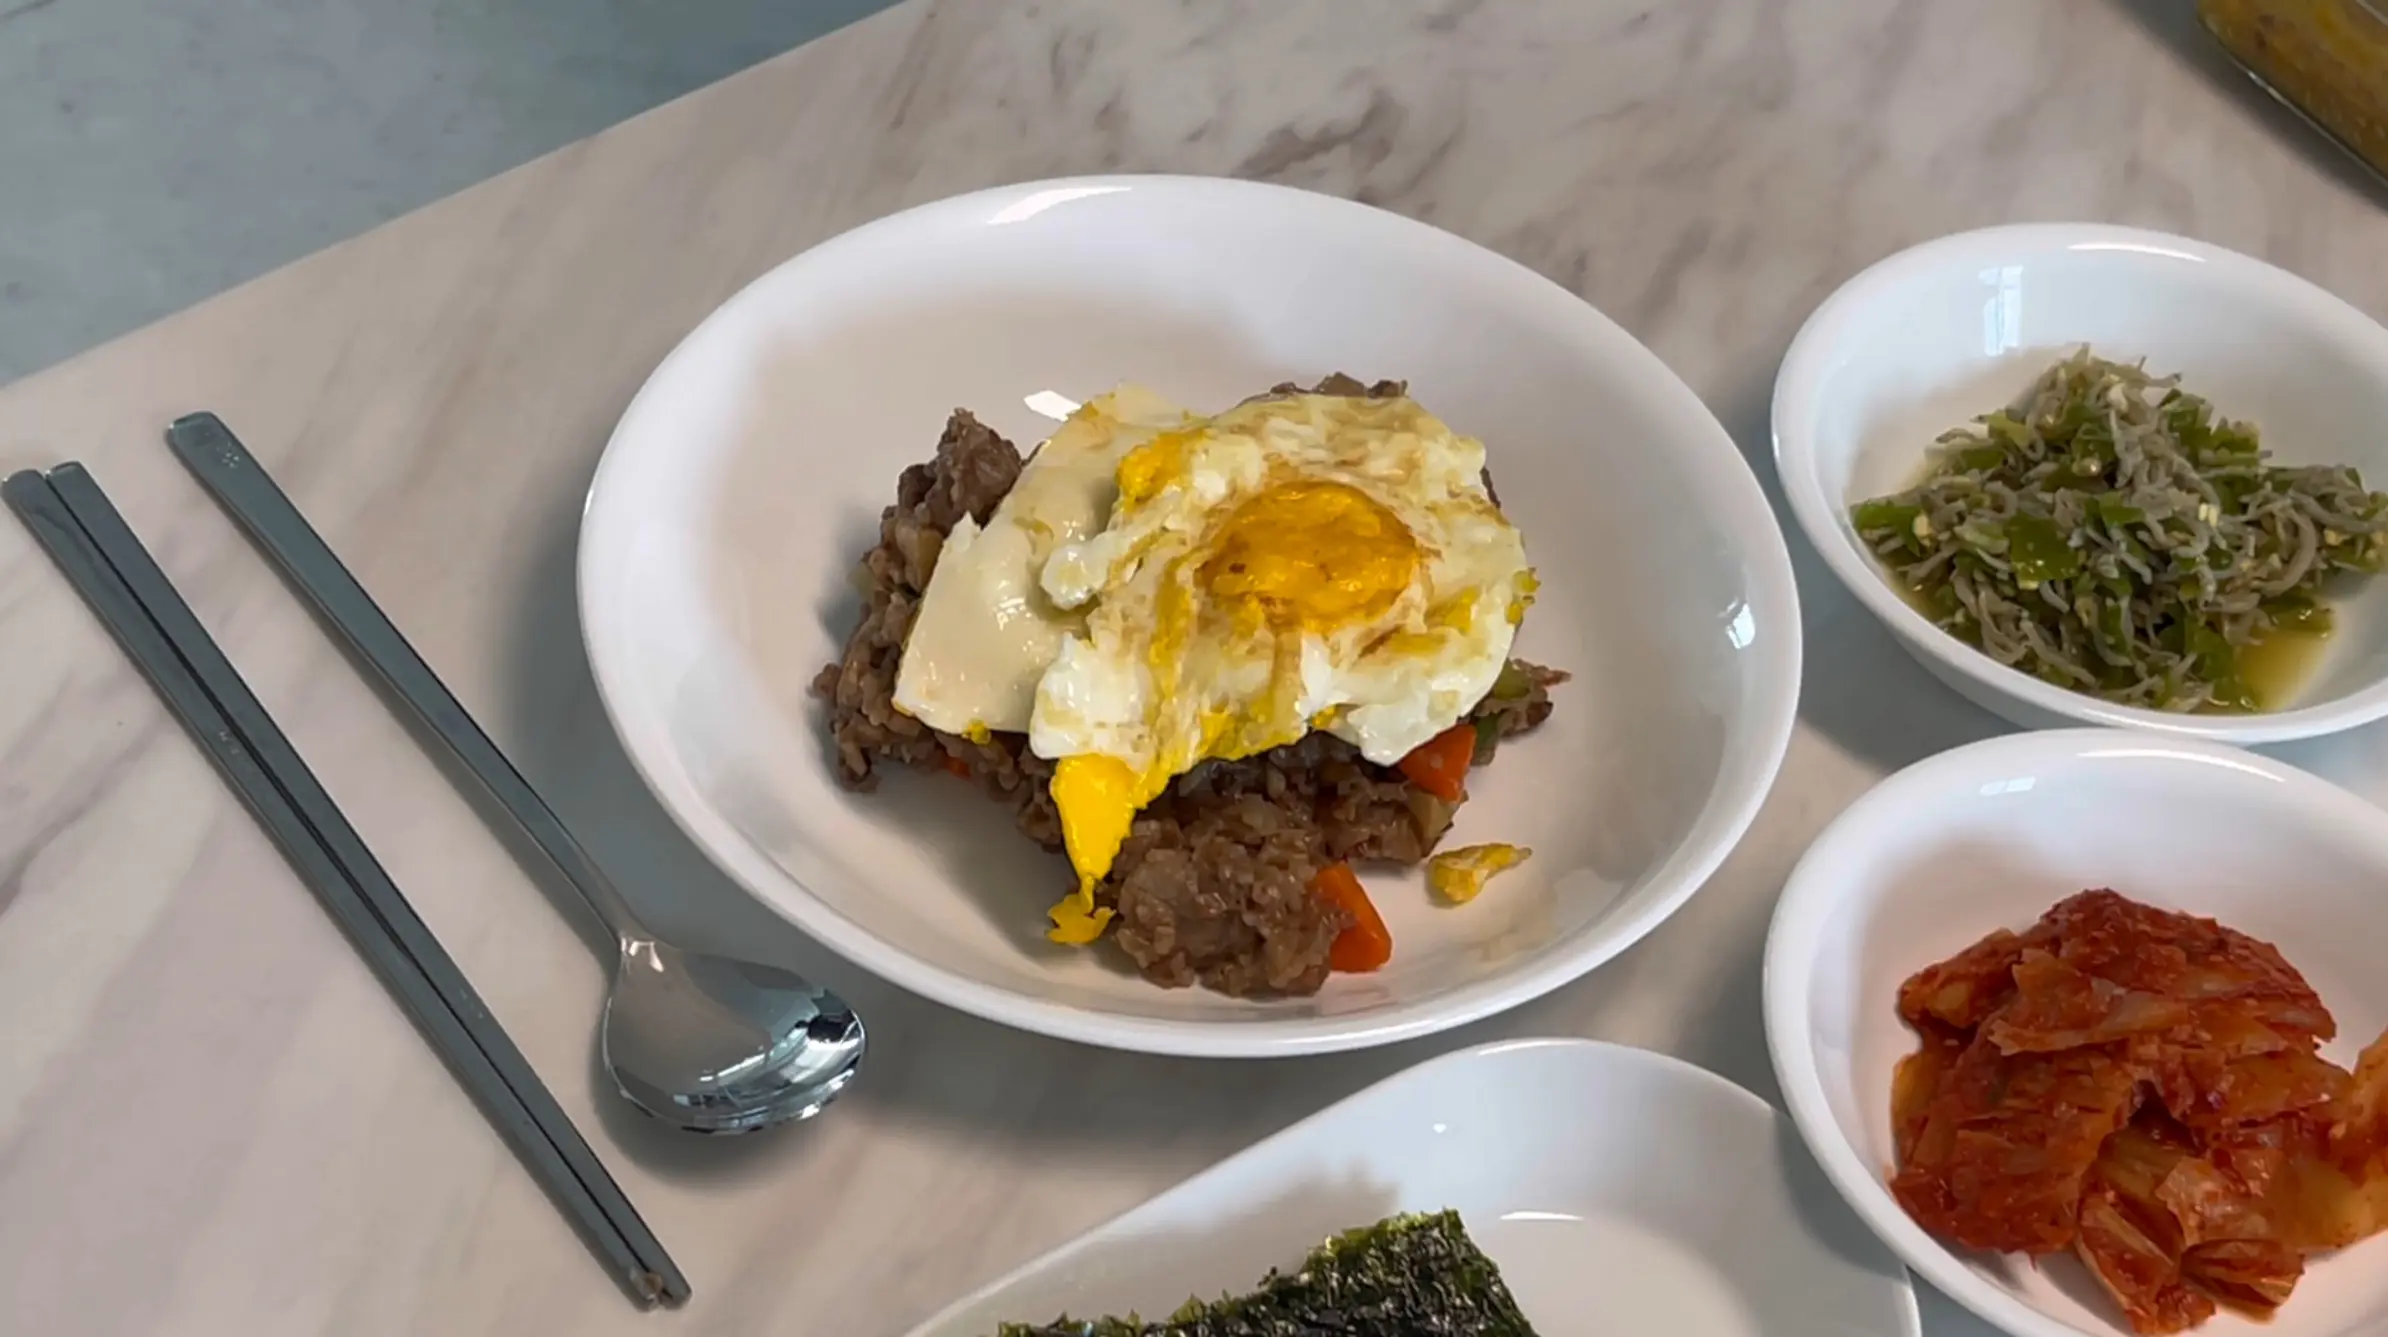
Finally, I plated the pilaf beautifully and set it on the table. Sitting down together with my husband, who worked so hard all day, and our sweet baby, who is just starting to babble and smile, makes this simple home-cooked plate feel warmer and more special than a five-star dining experience.
Cooking can sometimes feel like a chore after a busy day, but seeing the joy on my family’s faces as they take their first bites makes every ounce of effort completely worth it. Even though my rice was a little too sticky this time, that imperfection is just part of the charm of a real, loving home kitchen.
🧪 The Science & Pro Tips for Perfect Pork Pilaf
Achieving a restaurant-quality pilaf relies on the texture of the rice and maximizing savory reactions.
- The Role of Starch Retrogradation (Using Leftover Rice): Freshly cooked hot rice contains highly gelatinized, sticky starch. Sautéing hot rice leads to a gummy, mushy texture. Instead, use cold, day-old rice or cool down your cooked rice. Cooling causes starch retrogradation, rearranging the starch molecules into a firmer structure. This allows each grain to stay separate and get evenly coated with oil and seasoning.
- Maximizing the Maillard Reaction: Searing the marinated pork in a preheated, hot pan initiates the Maillard reaction—a chemical reaction between amino acids and reducing sugars that creates hundreds of new flavor compounds. Don’t crowd the pan; excess moisture will boil the meat instead of searing it.
- Adapting for Toddlers (Baby-Friendly Version): For infants or toddlers transitioning to solid foods, remove all gristle and fat from the pork, mince it finely, and reduce the soy sauce/oyster sauce by two-thirds. A drop of toasted sesame oil adds natural aroma without sodium overload.
👩🍳 SSUCOOK’s Recipe Trustworthiness & Food Safety Guide
- Family-Tested Recipe: This recipe has been hand-crafted, cooked, and family-approved by SSUCOOK. I test and refine every step in my own kitchen to ensure a reliable culinary experience.
- Safe Food Storage: Do not leave cooked food at room temperature for more than 2 hours. Transfer it to an airtight container and refrigerate below 4°C (39°F). Consume within 3 days. For longer storage, freeze portions for up to 1 month. When preparing meals for infants or vulnerable individuals, maintain strict kitchen hygiene by separating knives and cutting boards for raw meat and vegetables.
If you have some leftover cold rice and pork neck in your fridge, I highly encourage you to try making this Boston butt pilaf tonight. Even without professional culinary training, paying attention to the marinade prep and managing your pan’s temperature will yield a spectacular meal. Enjoy the process, share some warm conversations around the table, and have a beautiful day. I will see you in the next post with more delicious home-cooking stories!