Making Sausage Bread – With a Flavorful Basil Sauce
Sausage bread is a savory snack that originated when Western-style bread culture was introduced. Pizza bread became popular in the 1980s as a way to enjoy pizza flavors in a bakery-friendly format. Both are hearty and satisfying options for any meal.
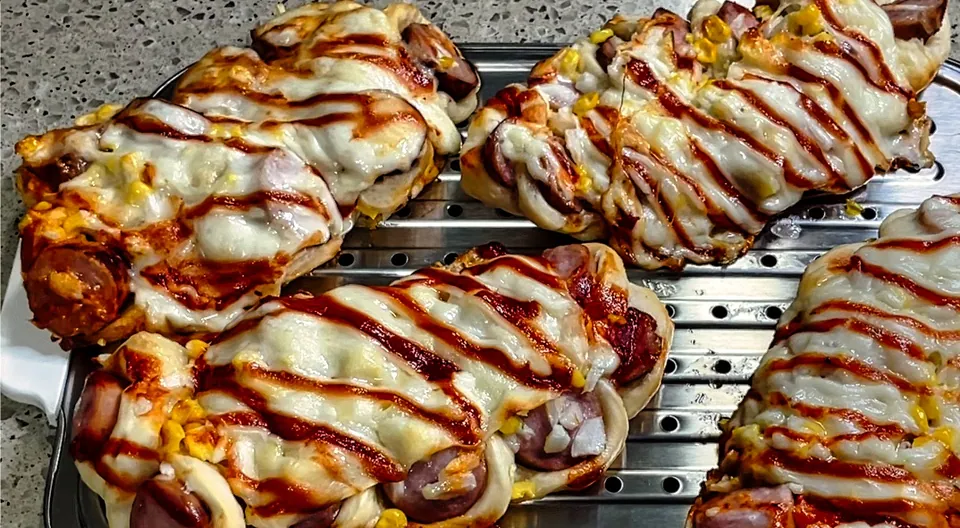
Hello there~ Today I baked some delicious, savory sausage bread right here at home!
It all started when my husband came home from work and mentioned, with a hint of nostalgia, how much he missed the classic Korean bakery-style sausage bread (often called “pizza bread” or “낙엽 소세지빵” in Korea). Since we had a package of high-quality sausages sitting in the refrigerator and a kitchen stocked with baking essentials, I decided to surprise him. I followed a wonderful recipe by Hoya as my foundation and set to work. As the bread baked, the kitchen was filled with the irresistible scent of melting cheese, toasted dough, and savory sausage. Even our baby was drawn to the kitchen, peering curiously at the oven window. This version is especially unique because it features a special basil sauce that elevates this humble bakery classic into a gourmet culinary treat.
Sausage bread and pizza bread hold a unique place in Korean culinary history. During the late 1970s and 1980s, Western-style foods and bakeries began gaining massive popularity in South Korea. When pizza was first introduced, it was considered a luxury item. To make these popular Italian-American flavors accessible to everyone, local bakeries developed a clever alternative: they put pizza toppings on a soft, sweet, enriched bun dough, wrapped it around a whole sausage, sliced it to resemble a leaf, and baked it. The result was a portable, affordable, and incredibly filling snack. Today, it remains a beloved comfort food for generations of Koreans.
As a self-taught baker, I have spent a lot of time analyzing the science behind dough elasticity, topping balance, and temperature control. In this guide, I will share the scientific principles and practical tips I have learned so you can bake perfect, bakery-style sausage rolls that hold their shape and deliver an explosion of savory flavor.
📋 Recipe Overview
- Prep & Baking Time: Approx. 1 hour 40 mins (including proofing)
- Difficulty: Medium
- Servings: 6 rolls
- Cooking Method: Oven Baking
🧂 Let’s Start with the Dry Ingredients and Dough Chemistry
Sausage bread dough is an enriched dough that must support a heavy load of toppings: sausages, onions, sweet corn, cheese, and multiple sauces. To prevent the dough from collapsing under this weight, we need a dough that is both soft and structurally strong.
Dough Ingredients:
- Bread flour: 250g
- Sugar: 25g
- Fine salt: 5g
- Dry yeast: 4g
- Unsalted butter: 25g
- Lukewarm water: 160ml (ideally around 25–28°C / 77–82°F)
When measuring your ingredients, place the dry yeast, sugar, and salt in separate corners of the mixing bowl. As mentioned before, salt and sugar are highly hygroscopic and will draw moisture out of the yeast cells if they touch directly, which can damage or kill the yeast. Mix each with a little surrounding flour before combining them all.
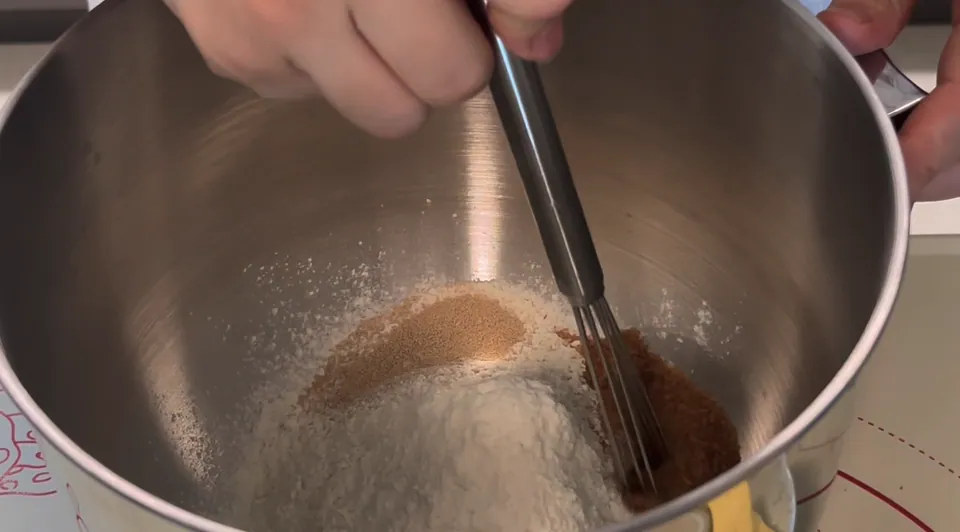
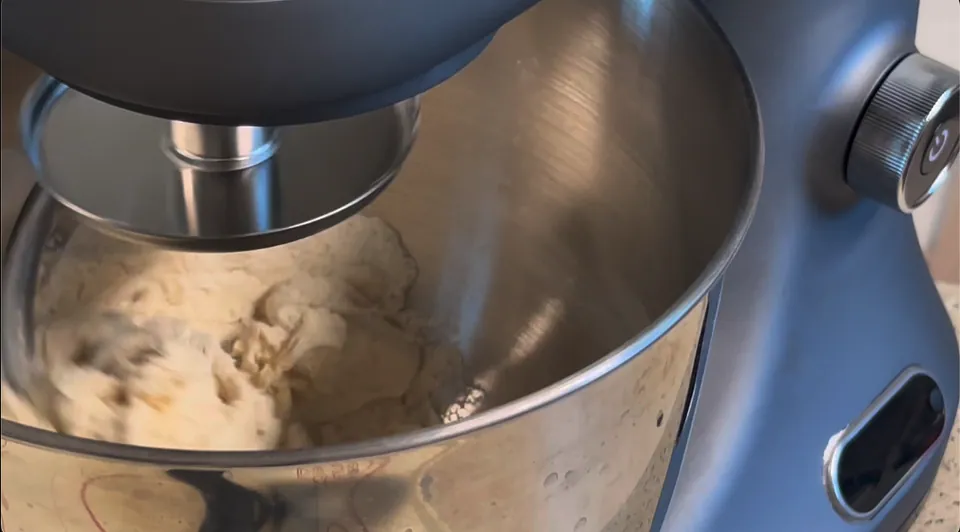
Once the dry ingredients are blended, add the lukewarm water and start the mixer. I used the automatic kneading mode on my mixer to establish a clean gluten structure without straining my wrists.
💡 The Science of Fat (Butter) in Enriched Doughs
One of the most common mistakes in breadmaking is adding the butter at the very beginning of the mixing process. Fats are hydrophobic, meaning they repel water. If you mix butter with the dry flour and water from the start, the fat molecules will coat the flour proteins (glutenin and gliadin) and prevent them from absorbing water. This prevents the proteins from linking up to form a strong gluten network. To avoid this, knead the flour and water until they form a cohesive, shaggy ball and develop a basic gluten structure. Only then should you add the room-temperature unsalted butter. Adding the butter later allows the gluten network to form first, which ensures the dough has the strength to rise beautifully and support the heavy toppings while yielding a soft, tender crumb.
For heavy, topped breads like sausage rolls, a weak gluten structure will result in a flat, dense, gummy dough. Using a stand mixer helps ensure the dough is kneaded thoroughly and reaches the proper elasticity.
⏱️ First Proofing, Dividing, and the Importance of Gluten Relaxation
Once the dough is smooth, elastic, and passes the windowpane test, shape it into a ball. Place it in a lightly greased bowl, cover it with plastic wrap, and let it proof at room temperature for 1 hour. The yeast will consume the sugars in the dough, producing carbon dioxide gas and ethanol, which stretches the gluten network and causes the dough to double in volume.
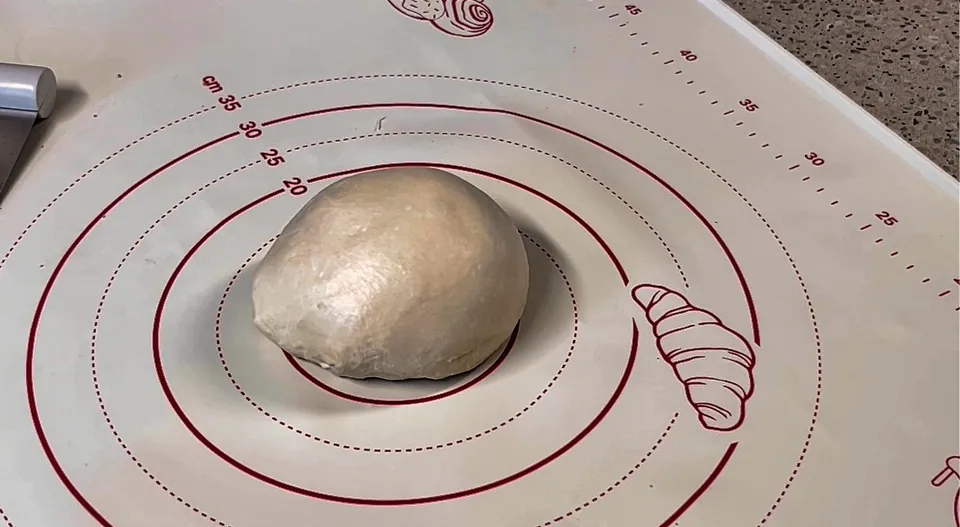
After the first proof, gently press down on the dough to release the large gas bubbles. Using a digital scale, divide the dough into eight equal portions, weighing approximately 60g each. Shape each portion into a smooth ball and let them rest for 15 minutes under plastic wrap to prevent the skin from drying out.
💡 Why the 15-Minute Bench Rest is Vital
Dividing and shaping dough stretches the gluten strands, making them tense and springy. If you try to roll out the dough immediately, it will shrink back or tear. A 15-minute bench rest allows the gluten proteins to relax and realign. This makes the dough extensible and easy to shape around the sausage without tearing.
🧅 Preparing the Savory Toppings and Gourmet Basil Sauce
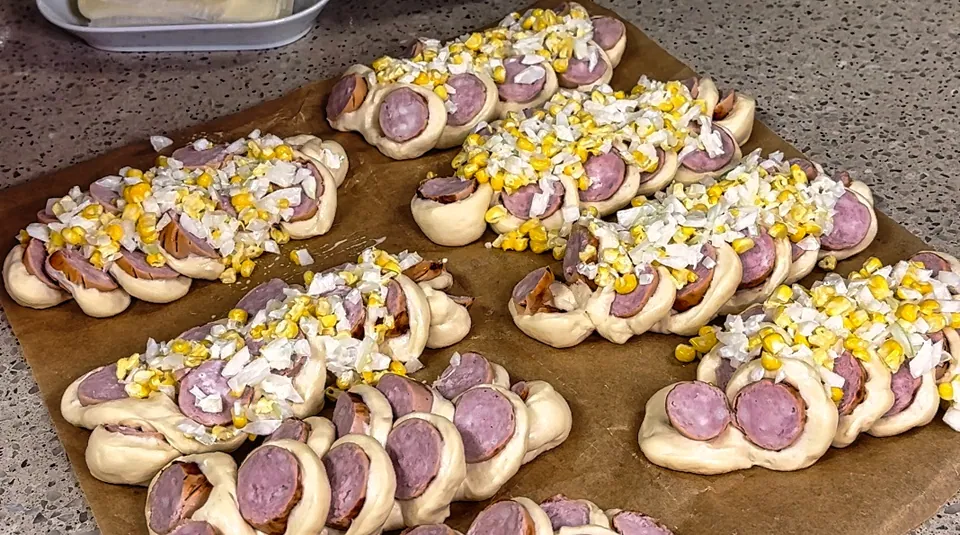
While the dough is resting, prepare the toppings. For the classic pizza bread topping, mix finely diced white onion and canned sweet corn in a 1:1 ratio. Add mayonnaise and a pinch of sugar, and stir well.
Tip: Adding raw onions directly to the bread can cause them to dry out or burn under the high heat of the oven. The moisture from raw onions can also make the bread soggy. Coating the onions in mayonnaise creates a protective oil barrier that seals in the moisture, keeping the onions sweet, translucent, and tender during baking.
Now, let’s prepare the highlight of this recipe: the gourmet sweet basil sauce.
Basil Sauce Ingredients:
- Water: 25g
- Sugar: 25g
- Honey: 25g
- Mayonnaise: 50g
- Basil pesto: 50g
- Combine the water, sugar, and honey in a microwave-safe bowl. Microwave for 30 seconds and stir until the sugar is completely dissolved. Creating this simple syrup ensures the sugar dissolves fully, preventing a gritty texture in the sauce.
- Let the syrup cool slightly. Whisk in the mayonnaise and basil pesto until the mixture is emulsified and smooth.
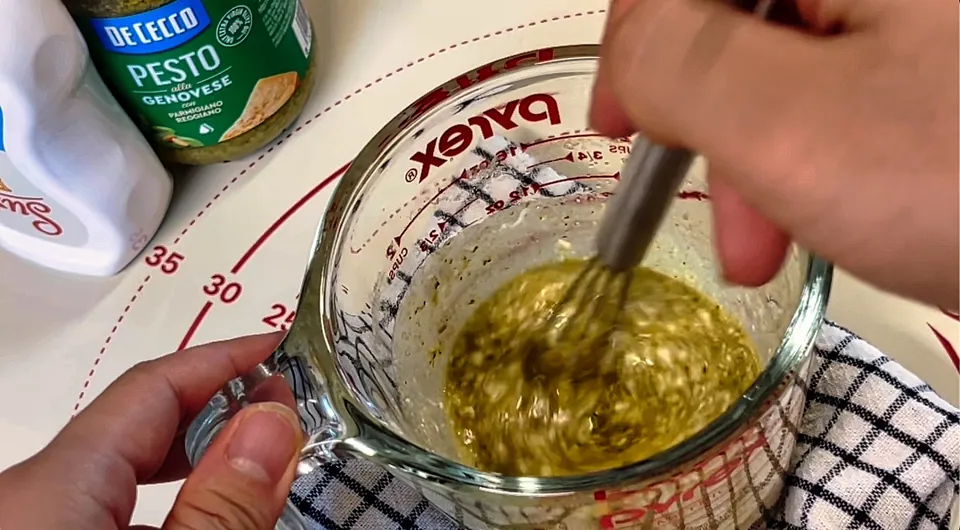
This sauce is a wonderful balance of sweet honey, rich mayonnaise, and herbaceous, savory basil pesto. It is incredibly versatile—you can store any leftovers in an airtight container and use it as a spread for sandwiches or toast.
🌭 Shaping, Cutting, and Assembling
Take a rested dough ball and roll it out with a rolling pin into an oval shape that matches the length of your sausage. Place the sausage in the center. (I highly recommend using sausages with a high pork content—at least 80% to 90%—as they have a satisfying snap and juicy flavor.) Wrap the dough around the sausage and pinch the seam firmly to seal it. If you don’t seal it securely, the dough can unravel during proofing or baking.
Now for the classic “leaf” or “flower” shaping technique: Using sharp kitchen shears, cut through the wrapped sausage at a 45-degree angle at 1.5cm to 2cm intervals. Crucial Technique Tip: Cut all the way through the sausage, but leave the bottom layer of the dough intact. If you cut through the bottom skin, the pieces will separate completely. Once you have made the cuts, gently twist each slice and lay them down, alternating left and right, to create a flat, leaf-like pattern.
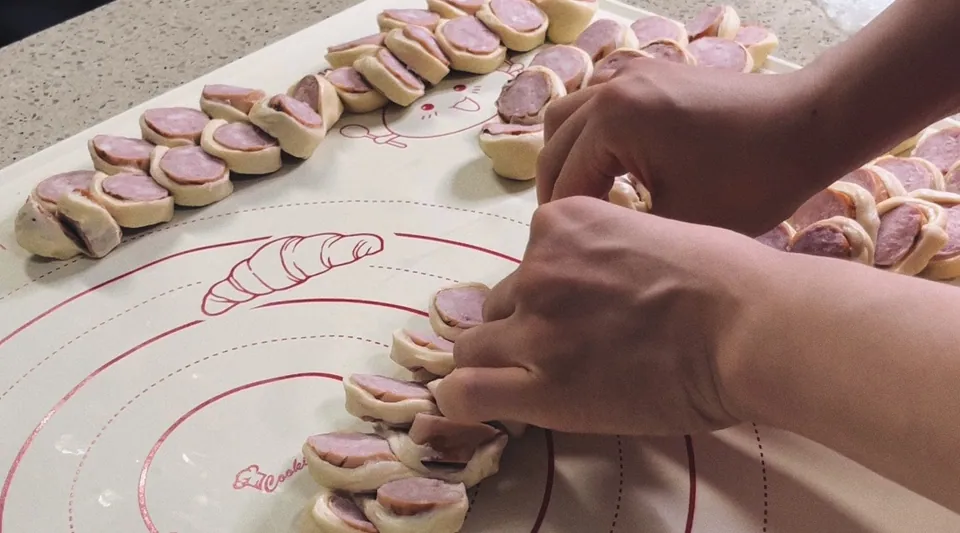
Place the shaped dough onto your baking sheet. Spoon the onion-corn mayonnaise mixture generously over the center of the dough, then top with shredded mozzarella and cheddar cheese. Finally, drizzle ketchup and mayonnaise in a zig-zag pattern over the top.
🔥 Second Proofing and Baking Chemistry
Let the assembled rolls proof at room temperature for about 40 minutes. Because these rolls carry a heavy load of toppings, do not over-proof them. Over-proofing weakens the gluten structure, making the gas bubbles too large. If this happens, the dough will not be able to support the heavy toppings and will collapse in the oven, resulting in a flat, dense bread. The dough is ready when the edges look puffy and spring back slowly when touched.
Preheat your oven, then bake the rolls at 180°C (356°F) for 20 minutes.
As the bread bakes, a series of chemical reactions occur. The proteins in the meat, cheese, and dough react with the sugars in the ketchup and syrup (the Maillard reaction) to create a beautiful golden-brown color and a deep, savory flavor. The lactose in the cheese also undergoes caramelization, forming a delicious, crispy cheese crust.
As soon as the bread comes out of the oven, use a pastry brush to apply the sweet basil sauce generously over the hot crust. The heat from the bread will melt the mayonnaise and syrup, allowing the fragrant basil flavor to soak into the warm crust.
Here is a quick, funny story from my kitchen: just as I pulled these beautiful rolls out of the oven and grabbed my brush to apply the basil sauce, my camera battery died 😢. Home baking and filming at the same time can be tricky! I was so disappointed that I couldn’t capture the final glaze on camera, but I can assure you that the flavor was outstanding. I will make sure my batteries are fully charged next time!
💌 Wrapping Up and Storage Tips
My husband loved this sausage bread. He told me it was the best pizza bread he had ever eaten, and that the sweet basil sauce was a game-changer. The herbal notes of the basil pesto cut through the richness of the sausage and cheese, making it light and flavorful.
If you have any leftovers, let them cool completely, place them in a zip-top bag, and freeze them. When you want a quick snack, reheat them in an air fryer at 170°C (340°F) for 7 to 8 minutes. They will taste just as crispy and delicious as the day they were baked.
If you’re looking for a fun baking project this weekend, I highly recommend giving this gourmet sausage bread a try. It is a wonderful comfort food that is sure to bring a smile to your family’s faces.
🧪 The Science & Pro Tips for Perfect Sausage Bread
Creating the iconic leaf shape (낙엽송) and getting a nicely browned toppings require understanding gluten structure and emulsion stability.
- Gluten Window for Structural Strength: The dough wrapper must contain and support a heavy sausage while expanding in the oven. Knead the dough until you reach the gluten window stage—where the dough can be stretched thin enough to see light through it without tearing. This prevents the dough from bursting or collapsing during baking.
- Managing Sausage Salt: Sausages have high sodium content, which naturally draws water out of yeast cells and stunts fermentation. Ensure your dough goes through a thorough primary proofing (fermentation) before wrapping the sausages to lock in gas volume.
- Baking Mayo and Cheese Emulsions: Mayonnaise is an oil-in-water emulsion. If baked at too low a temperature, the emulsion breaks, leaving a pool of grease. Bake at a relatively high temperature (180°C - 190°C / 356°F - 374°F) to quickly cook the surface proteins, browning the cheese and stabilizing the mayo toppings.
👩🍳 SSUCOOK’s Recipe Trustworthiness & Food Safety Guide
- Family-Tested Recipe: This recipe has been hand-crafted, cooked, and family-approved by SSUCOOK. I test and refine every step in my own kitchen to ensure a reliable culinary experience.
- Safe Food Storage: Do not leave cooked food at room temperature for more than 2 hours. Transfer it to an airtight container and refrigerate below 4°C (39°F). Consume within 3 days. For longer storage, freeze portions for up to 1 month. When preparing meals for infants or vulnerable individuals, maintain strict kitchen hygiene by separating knives and cutting boards for raw meat and vegetables.
Have a wonderful, warm, and delicious day! ☀️